Posts

Slinging Ply

Image
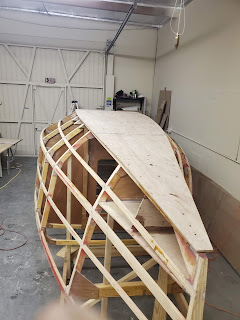
  Next up is epoxying and screwing down the plywood inner bottom.  It's not a complex process.  Put the plywood over the hull structure in the right spot, draw pencil lines around all of the stringers and ring frames. Predrill screw holes through the ply into all of the stringers and ring frames.  Remove the plywood to a bench. Brush full strength (unthickened) epoxy on the ply.  Then brush thickened epoxy on all of the touching stringers and ring frames.  Carefully replace the ply in the right spot, and start putting screws into stringers and ring frames.  Once it's fully screwed down, crawl under and wipe up all of the epoxy that squeezes out, either with a radiused tool or with a square corner.  The inner bottom is the easiest, so have fun. Now for the topsides of the hull.  It's also pretty easy.  It is kind of installing an in an "average" way, so that there's a minimum of material to remove, and there are no gaps to fill in.  ...

Frame Details

Image
Here is where it's good to spend some time thinking about how deck hardware gets placed and where backer plates should be.  The hardest to get to were going to be where the aft cleats are and where the running backstays are mounted.  It was easy to get to them before the rest of the ply was in, so I put them in now. I'll put some more up in the bow where the bow cleats will go, but those will be easy to get to once the deck is on, so I'll leave them for later.  I'll put some in where the daggerboards go as well.  As long as I put them in before the cockpit floor, seats, seat backs, and floor sides go in, they'll be easy too.

Skeg party

Image
 So, Hull 79  helped me out  shaping and glassing the skeg. Follow the link, and you can see how he shaped and glassed it. When the skeleton (the welded bolting arrangement for the skeg) was made, I made an aluminum bar with the proper spacing for the bolts.  I assembled the bolts into the bar with nuts.  Then the horizontal connecting bar was held against the bolt heads, and it was all welded together. When the skeleton was welded together, it was time to eposy it into the skeg.  I used the same aluminum bar to set it into the hollowed out skeg carefully and centered. Slightly funny, slightly scary story...  I mixed up lots of epoxy, with lots of thickener to fill the skeg and support the skeleton.  I was advised against doing it in one shot, but I tried anyway.  Not a good idea.  I placed the skeleton, poured in the epoxy and thought, "Great.  Job done."  Well, about 10 minutes later, I look over and the thing is smoking/offg...

Long Time, No Blog

Image
 Another case of weird perception.  I haven't posted a blog in a long time because I didn't feel like I was making enough progress to write about.  Looking back, however, is showing me that I've been making good progress.  It's hard to see on a day to day basis, but over a longer period of time, it's actually been moving.  As a result, this will be a longer catch-up post, and I'll try to be better in the future and post roughly weekly. Then it was time for the long, tedious process of putting in epoxy fillets and cleaning them up by sanding.  The fillets are thickened epoxy, applied with popcicle sticks and/or tongue depressors.  It's a messy process, and takes some practice to avoid spending your life removing excess epoxy.  Once the epoxy kicks, the fillets need to be cleaned up.  To some extent, they can be sanded with a cartridge roll, which is a piece of rolled up sandpaper with a hole in the middle.  The roll is assembled onto a ma...

And Now For Something Completely Different...

Image
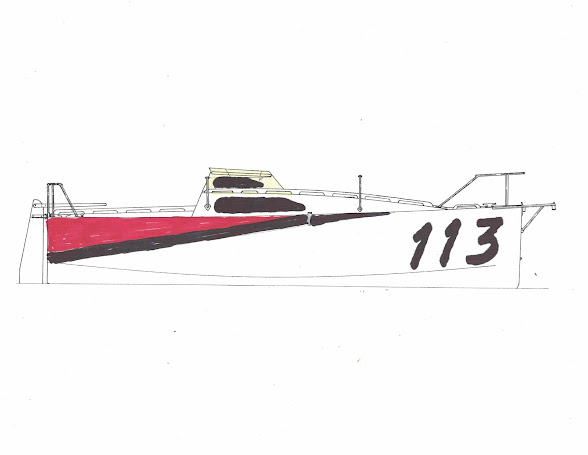
So, in the interest of thinking about something else, I've been spending some time on paint schemes and things like that.  We (my lovely wife and I) sat down last Saturday night, each with the requisite cocktail, and made some sketches.  What do you think?  Think you can do better?  Here's the link to the blank line drawing that Hull 79 gave me (link on Hull 79's page).   Link Here Our ideas... The last is a really bad representation of what I was intending.  I didn't have the right colors, but  here's  a link to what I was intending. The side of the cabin where the lower window is will need to be some bright (probably florescent) color (safety yellow, orange, pink, green).  All boats will be required to carry their hull number (113 for me) on each side of the bow in large numbers as well. Share your ideas with me.  I'd like to see what other people think.

And then it gets faster...

Image
 So, I guess this is like all projects.  You work and work and work doing small, seemingly inconsequential stuff, and then all in a couple of hours, it seems to make a huge jump ahead.  After a bunch of prep of rings by sanding and epoxy coating and fitting and installing hatches (people and inspection), we finally hung the rings on the strongback. I haven't hung the stem yet because it needs some shaping.  Once that's done, it's just about putting in a bunch of epoxy fillets to hold everything together.  Then it's on to installing and shaping stringers.

Almost imperceptively slow progress

Image
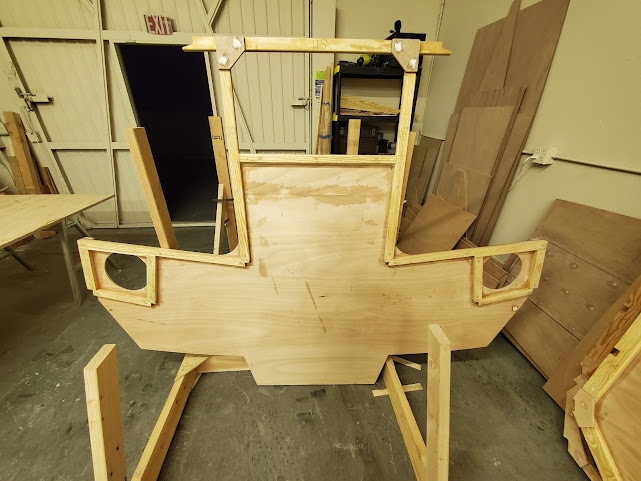
Turns out that there's a ton left to do on the frame rings/bulkheads.  They're in the right shape, but to make them waterproof, I'll be putting at least a full coat and maybe two of epoxy all over.  A couple of the frames will have waterproof hatches and/or inspection ports.  The inspection ports need small backing rings, and the big hatches need backing frames.  The round holes in the frame above access the areas behind the cockpit seats.  That frame creates the back of the cabin house/front of the cockpit, so those ports will be accessed from inside the cabin.  Since it's way easier to cut them out and apply the backers before they're installed, I'm doing that.   On the subject of stringers, we spent last Saturday buying, planing and ripping up stringers.  We decided on 2x8x 12' prime kiln dried Douglas Fir studs.  This helps us avoid most of the bad knots.  The kiln dried part keeps us from having to wait months for the wood to d...