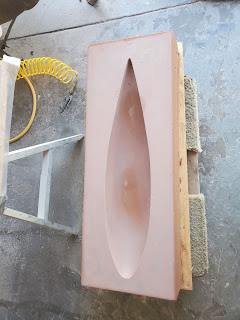
Skeg party
So, Hull 79 helped me out shaping and glassing the skeg. Follow the link, and you can see how he shaped and glassed it.
When the skeleton (the welded bolting arrangement for the skeg) was made, I made an aluminum bar with the proper spacing for the bolts. I assembled the bolts into the bar with nuts. Then the horizontal connecting bar was held against the bolt heads, and it was all welded together.

When the skeleton was welded together, it was time to eposy it into the skeg. I used the same aluminum bar to set it into the hollowed out skeg carefully and centered.
Slightly funny, slightly scary story... I mixed up lots of epoxy, with lots of thickener to fill the skeg and support the skeleton. I was advised against doing it in one shot, but I tried anyway. Not a good idea. I placed the skeleton, poured in the epoxy and thought, "Great. Job done." Well, about 10 minutes later, I look over and the thing is smoking/offgassing/steaming. Not good. So, I supported as above in some water to a) help carry off some of the heat into the water and b) if it catches fire, maybe it'll fall into the water and quench itself. Well, I got lucky and nothing bad happened. Please learn from my almost mistake and almost disaster. Do it in layers, do it in small batches, do it carefully, or do it twice.
Then, I pulled off the aluminum bar, and now I'll keep it until I drill the hull.


Comments
Post a Comment